I. Materials
-Play-Doh: $1
-Manila folders: ~$5
-2 2 Liter Bottles: ~$5
-Box cutter and scissors: Home
-Packing tape: ~$1
-Cotton Balls: ~$2
- Plastic bag: It costs like 10 cents at Safeway
We found most of these materials at our homes. The only material we had to buy was Play-Doh.
II. Procedures
We started this project by making our escape pod. This part of the rocket will hold the egg and parachute, and will separate from the rocket after launch.
1. Take one of your 2 liter bottles. In order to make the escape pod, you have to cut off 1/4 of the bottle, and make sure to cut off the bottom of the bottle, which is the end where you would stand the bottle on.

2. Next, take a manila folder and fold it so that you can make a cone shape. This is somewhat complicated to explain but if you see the picture you might understand it better.

3. Once you made the cone shape with the manila folder, tape the cone with packing tape so that it holds it's cone shape and then tape the cone onto the escape pod, which is the bigger end of the bottle. Next fill the escape pod with cotton balls and then take your plastic bag and tape the ends of the plastic bag into the escape pod and stuff the bag into the escape pod. Once this is finished your escape pod should be finished. Ours looked like this.

Explanation: You store the egg in the area between the cotton balls and the bag. When the rocket launches, the escape pod will separate from the rocket and then the parachute should deploy. The cotton balls are supposed to provide a softer landing for the egg, and the cone is in order to make the rocket fly more consistently through the air. Without the cone the rocket might not fly in a linear path.
After we made the escape pod, we made the body of the rocket. This part of the rocket will hold the water and takes little work to make. You don't have to make any cuts in the bottle for this part.
1. First, take Manila folders and cut out three fin shapes. You can experiment with the size of the fins and the shape. Ours looked like this.

2. Next tape the fins onto the rocket. We used three fins and we taped them so that they were equidistant from each other. The fins should be taped on vertically like so.

This was our finished product. It's pretty simple and easy to make. The parachute didn't deploy though so that might need improvements. Also, we were planning on using Play-Doh in order to make the rocket top heavy, but we ended up not doing that because it would add unneeded weight. We still bought the Play-Doh though so I added it into the materials list. In order to launch the rocket, you fill the rocket with water and place it onto the launching mechanism. After this you attach the escape pod onto the rocket, and when the rocket launches the escape pod should fly off of the rocket and shoot up.
III. Results
Our rocket did pretty okay in terms of height and separation. The escape pod went up roughly 75 ft which is the required height. The escape pod successfully separated from the rocket, but the parachute did not deploy and the escape pod shot straight down to Earth. The egg did not survive. If we had a better parachute that could deploy more consistently, I believe that our rocket would have been a lot better. Everything went according to plan except for the parachute not deploying. The weather was pretty good as well, not too windy and clear skies.


As you can see the egg did not survive.
IV. Conclusion
Our rocket was pretty solid, the only thing that I would change is the parachute. If the parachute was able to deploy then our rocket would've been solid. I have no idea on how to make a good parachute that would deploy when the escape pod reaches the required height, but maybe if we were to make the parachute more compact and tape strings onto the handles of the bag and tape the strings onto the escape pod. Doing this might make the parachute deploy more easily.
V. Diagrams/ Pictures
Pictures are on most of part I, II, and III.
Calculations
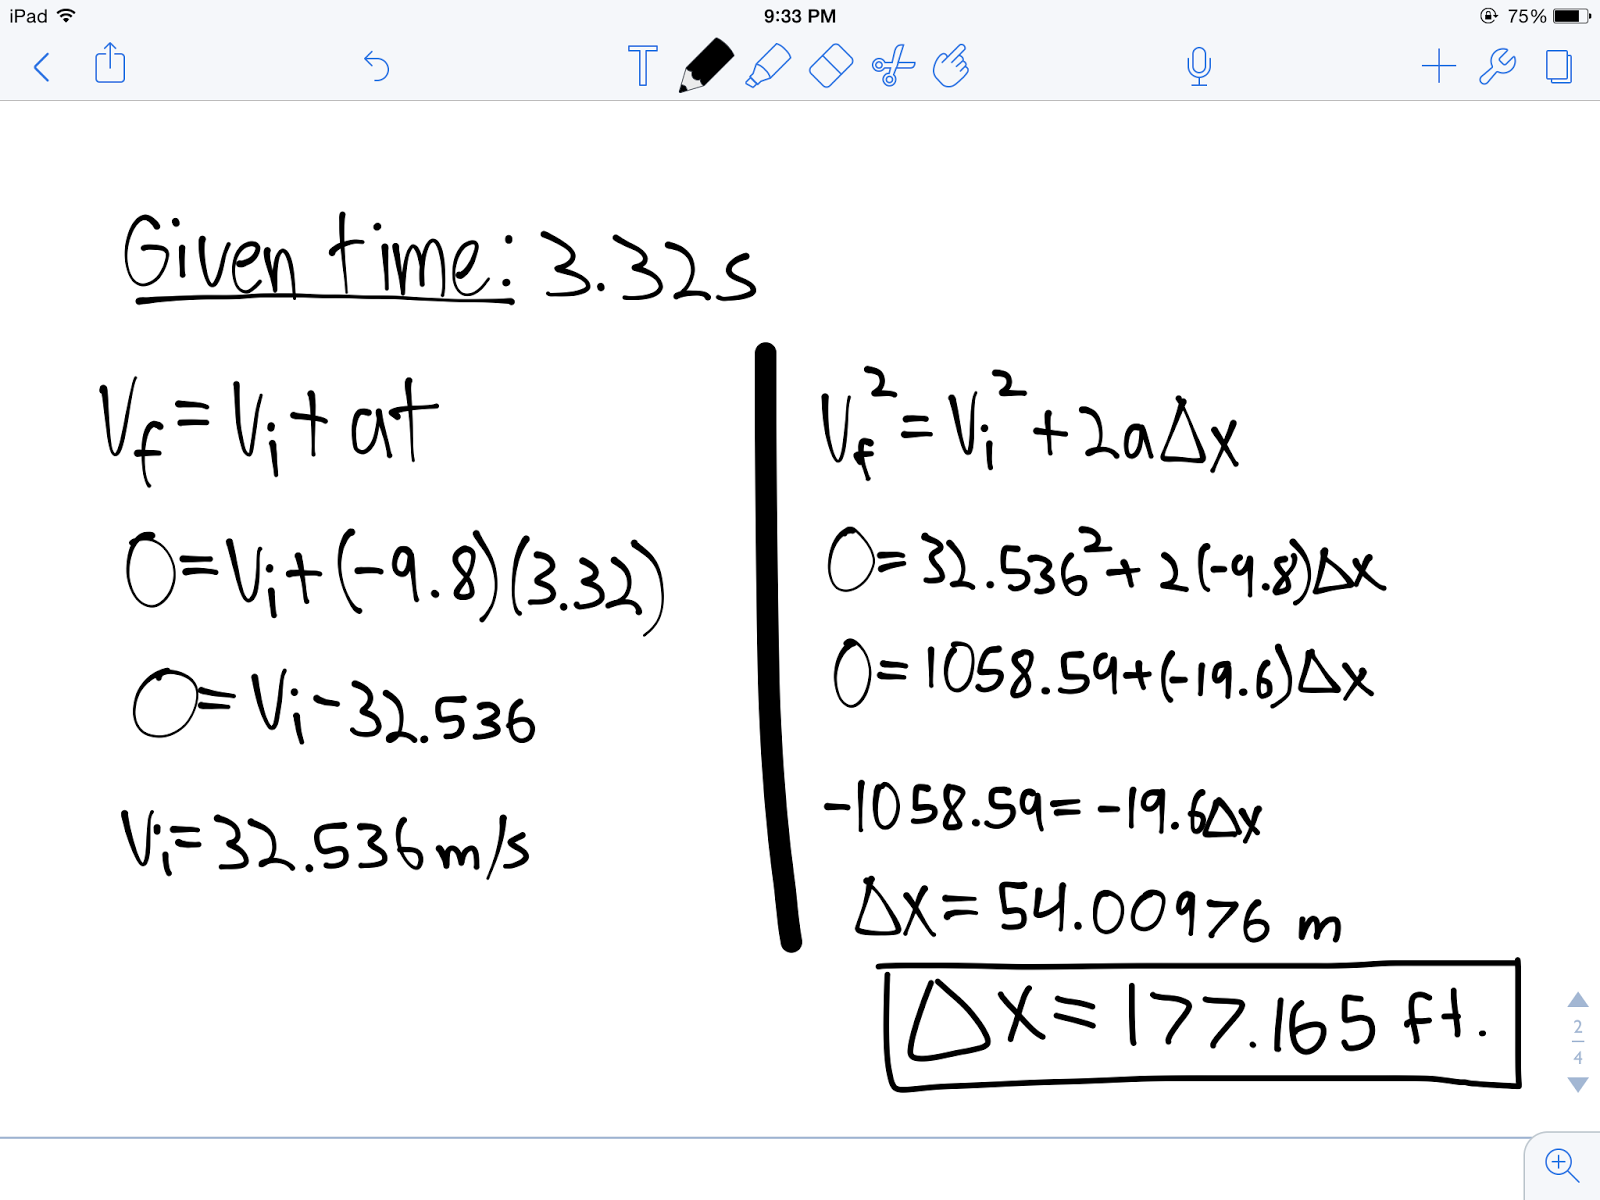
1) Using the time given, calculate the height of the rocket at the highest point (apogee). Compare this to the height given by the teacher. Which one do you think is more accurate and why?
The highest point the rocket was at was 177.165 ft based on my calculations.
I believe that the distance Mr. Yav gave us was a lot more accurate. I don't really understand why the height I got from the calculation was so far off from 75 ft, but I am pretty sure the work is correct.
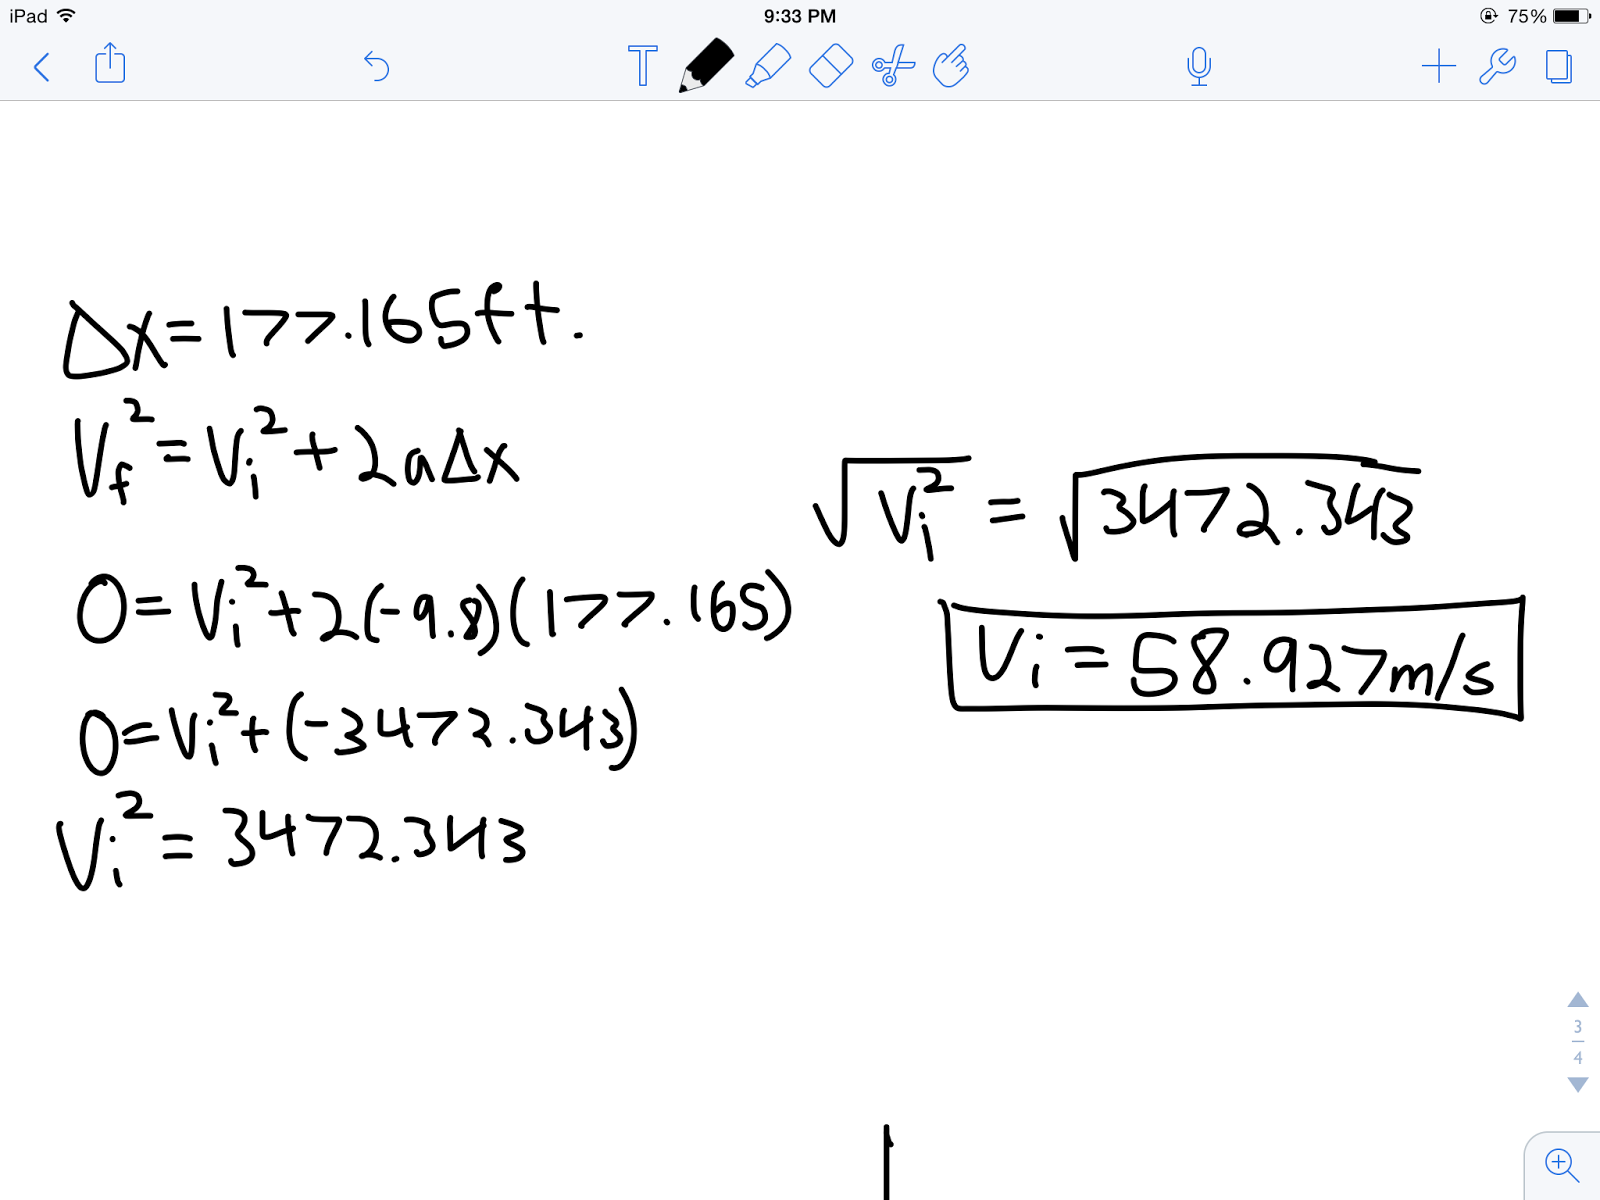
2) Using your calculated height from part 1 (not the given height), calculate the initial velocity of the rocket at which it left the launch pad.
The rocket left the launchpad with a velocity of 58.927 m/s based on this calculation.
3) a. Draw and label a force body diagram (FBD) of the rocket the moment it lifts off from the launch pad.
b. Draw and label a force body diagram (FBD) of the rocket at the highest point in its trajectory.

Explanation:
a. The only forces acting on the rocket during its launch are gravity, because while on Earth gravity is always acting on objects, and the applied force which shoots the rocket into the air. If there was no applied force the rocket wouldn't go anywhere, and the applied force has to be significantly greater than gravity so that it would shoot up into the air.
b. While in the air, the only force acting on the rocket is gravity.